Drivers of cars and trucks They are interested in how to connect an ammeter and a voltmeter in a car. The need to install these indicators is due to the desire to have full control over the state battery and generator set. Most modern cars and previously released do not have such indicators installed by the manufacturer. True, in cars with on-board computers, it is possible to control the voltage in the circuits of the car, in the rest of the models the owners are involved in installing the instruments.
How to connect an ammeter and a voltmeter in a car is especially interesting for owners of used cars, as many components and assemblies, including generator set have already been worn out, so they can work with violations. The test lamp only signals the absence of onboard voltage, and this is clearly not enough. For example, if you do not notice in time increased stress charging the battery, it may cause its failure.
About the functions of these pointers
Each control or measuring device installed in the instrument panel of the car informs the driver about the performance of a particular vehicle system. This allows you to operate the machine without compromising its technical condition. However, the power supply system of many cars is deprived of the opportunity for such control. Owners of cars are trying to solve such problems on their own by installing an ammeter or a voltmeter, and some owners install both of these pointers.
Ammeter installed in electrical circuit , will show the system consumed electricity . From these data, you can judge the process of charging the battery and in a timely manner to identify and eliminate the problems encountered. The voltmeter also allows you to keep this process under the control of the driver, which increases the service life of electrical equipment. Here are the main reasons for installing these devices on the car.
What products are used?
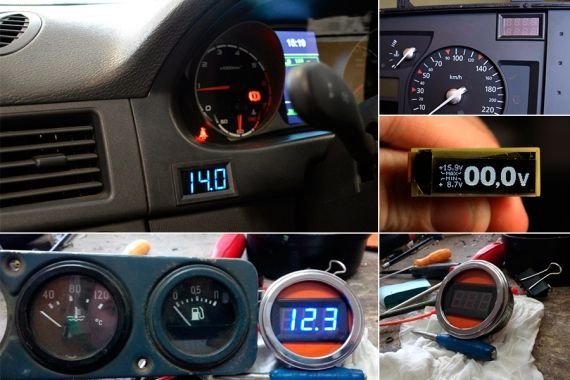
Some time ago, finding and installing such a device was a big problem. Motorists installed ammeters from trucks on their cars, and those drivers who were on "you" with radio electronics, picked up measuring instruments . The first domestic machines in which the voltmeter took his permanent place on the dashboard, was the VAZ 2105, and a little later they appeared on other models.
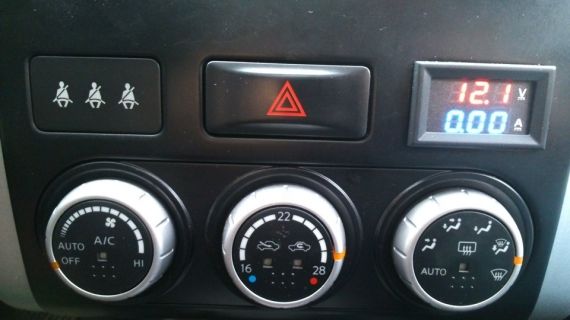
Today, this problem does not exist, as there is big choice such products in retail chains. Can be installed in the panel Digital Watch which simultaneously with the current time show the voltage of the on-board network. There are electronic tachometers, which, after pressing the desired button, perform the functions of a voltmeter. Such devices do not cause any problems with the owners.
Also today automobile ammeters and voltmeters are on sale, and individual drivers independently adjust the devices that are used in electronic devices. The installation of such signs poses some difficulties, since it is necessary to select shunts for them, to perform calibration or to make new scales. Therefore, we will not dwell on this.
How to install such indicators? We will assume that you managed to purchase an ammeter or voltmeter designed for use in automobiles; now we will consider the process of installing them. It should be recalled features of connecting them to the electrical circuit.
The ammeter is connected only in series between the current source and the consumers, and the polarity of the connection is always observed, plus from the source to the plus of the device, and so on. The voltmeter is connected only in parallel to the power source, also subject to polarity.

We connect the ammeter
Let's start with the fact that the work can be started only after disconnecting the battery. A significant current flows through this device, so you need to pick up wires of the appropriate cross section. It should be connected to an open wire that supplies power to the ignition switch. At the ends of the wires should be installed and crimp tips with pliers, otherwise due to poor contact will be heated junction.
After installing the wires, check the connection. To do this, turn on the load, for example, near or high beam . The ammeter should show the discharge, if it shows the opposite value, then the connection wires should be swapped. Then you should start the engine and make sure that the battery is charging.
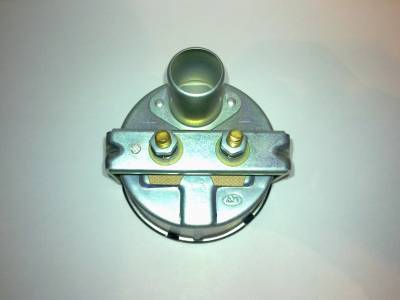
Catalog number: 3811010-АП111Б
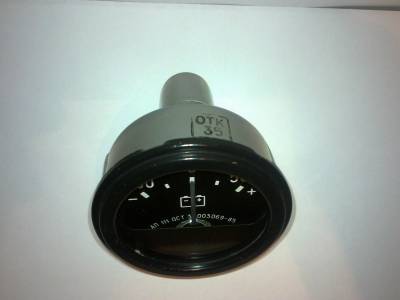
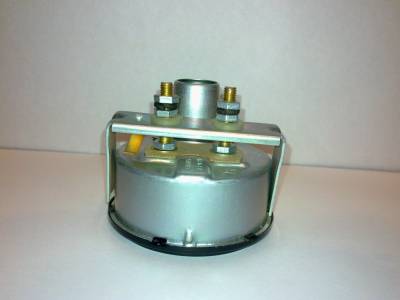
Technical characteristics of the Ap-111 Ammeter
Applicability
Tractors T-150 K, 158, DT-175S, 75 U, T-130 MG, PAZ-672, GAZ-71, 66-01, UAZ-469RH, URAL-479
Ammeter Installation
On most cars, to monitor the operation of the power supply system, only the charge indicator lamp is used, which does not monitor the state of the battery, charging current, the voltage in the on-board network and, moreover, does not allow to determine a number of faults in the circuits. Full information on the operation of the generator and the battery can be obtained by equipping the car with an ammeter and a voltmeter.
The ammeter is usually connected to a wire break from the generator to the battery. For example, on VAZ machines between the "B +" terminals of the generator and the "+" battery. The ammeter should be connected with a wire of a suitable cross-section. For example, an AP-111 ammeter must be connected with a wire of at least 20 kV in cross section, otherwise the wire will be heated. The Ammeter itself during operation can also heat up a little, since a shunt is installed inside it, on which, with a large current, heat is also released, this is not a malfunction.
The voltmeter connects much easier, in any place where there is a "+". Accordingly, one contact is connected to the body of the other, it is more convenient to connect to the terminal of the ignition lock where the "+" appears when the ignition is turned on. The illustration shows a typical schematic diagram connect ammeter and voltmeter
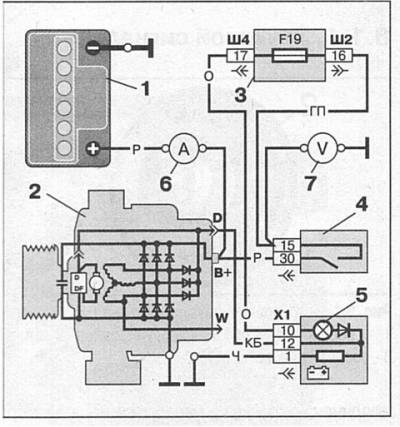
Connection diagram ammeter and voltmeter:
1 - rechargeable battery
2 - generator
3 - mounting block
4 - ignition switch
5 - battery charge indicator lamp located in the instrument cluster
6 - ammeter
The rules of how to connect an ammeter should be known to everyone. For example, such knowledge is often used in compiling assignments for experimental rounds of school olympiads or laboratory work.
Let's start with the principle of operation of the ammeter. The fact that it measures the current is obviously just from the title. It happens in the following way : electric current moving along the circuit passes through the device. This creates a torque, which causes the deviation of the dynamic (moving) part of a certain angle. Such a deviation is directly proportional to the strength of the current. This is then displayed visually, for example, by moving the arrow or by drawing a number.
Recall the concepts of parallel and serial connection. If you need to measure the current on any receiver, then its value should coincide with the fact that it passes through the ammeter. This is specific to serial communication.
However, the mode of attachment is not the only one. important condition how to connect the ammeter. No less important is the resistance of the ammeter. If it suddenly turns out to be higher than the resistance of the receiver, when the device is connected, the system of the circuit will fail, and the value of the current acting on the receiver will change.
When connected to a break, it doesn’t matter whether the “plus” is connected to a power source or an instrument. The main thing is to consistently and not in parallel.
There are several types of ammeters. Among them are analog and digital. With help you can measure both constant and alternating current . However, for any of them, the rules for connecting an ammeter remain unchanged. One has only to check which current is measured by a specific device. This is indicated on the device itself. If the current is constant, “=” is indicated, if the variable is “~”. This must be done, otherwise the ammeter will not work.
In addition, when working with electricity, you must follow the safety rules. When in contact with bare wires and carelessly, there is a chance that if you do not get an electric burn, then it will be very unpleasant sensations. This is especially true of real installations, because in a school lab, as a rule, the circuit runs on batteries, and the current is not too high.
In this way, characteristic feature ammeter is it serial connection . This limits the number of ways to connect an ammeter.
Ammeter. Current Measurement - Video
What products are used?How to install such indicators?